| Enable Feature (Admin only) | Enabling and Creating a Microlearning Micro-Course |
| Workspace | Academy, Training Admin |
| Roles | Admin, Training Manager, Jobs or any custom role granted the 'Create Micro-course' permission |
Sometimes the best way to learn is in small blocks. Enter Microlearning, a way to help your team members learn new information in small doses, over a period of time, almost like flashcards. Using text, images, questions, and stacks (a combination of text or image and a question), users can now quickly go over information and learn new skills.
Enabling Microlearning
Microlearning needs to be enabled by Schoox first before you can enable it in your Academy.
In the left navigation, make sure you are in the Academy Workspace.
When in the Academy Workspace, select Settings.
On the left, select the Training filter type.
Use the search bar, or scroll down, to find Microlearning and switch on the toggle next to Turn on microlearning in this academy.
Creation - Navigation
When in the Academy Workspace, select Training Admin.
Select Manage Training and then select Microlearning.
Here you can see all current Microlearning courses, as well as create new ones. Click on Create Microlearning to start.
Creating Microlearning from Scratch
Step 1:
If you have access to and have toggled on the Enable AI Features, you will get four different options. If not, it will automatically start with Start from Scratch.
To manually create a new micro-course, click on Start from scratch and select Start Designing.
Step 2:
In the next screen, fill out all the required information. The Title, Language and Training Category are mandatory fields.
- Title: The name of the micro-course
- Description: A short description on what the micro-course is about
- Language: The language the micro-course uses
- Training Category: The category the micro-course is in
- Estimated Time: How long it takes users to complete
- External ID: The ID used to share it
- Tags: Tags to help users easily find the micro-course
Step 3:
This is where you start to create your micro-course. You want to add cards that users then get in slow, bite-sized pieces, based on the schedule you will set up later. There are five kinds of cards:
- Text: These cards have text for users to remember.
- Videos: These cards have images for users to remember.
- Images: These cards have images for users to remember.
- Questions: Short quizzes for users to test their knowledge.
- Stacks: Flashcards, with text or images on one side, that then flip over to a question.
When you are done, click Configure to create the micro-course.
Step 4:
If Skills are enabled in your Academy (Enabling Skills in Your Academy), you now will be asked to map skills to the micro-course. This way learners can improve their skill scores by finishing the course, and the course will be included in Career Path and Job Training recommendations if said skills are mapped to jobs.
- Skills: Chose Academy Skills from the dropdown menu
- Al Recommendations: If AI is not disabled, you will get recommended skills here. By adding these skills, they will be mapped to the micro-course and added to the Academy.
Select your skills, scroll down, and click Save.
Scroll down to Create Microlearning (Continued) for the next steps. These are the same whether you are manually creating a Micro-course or using AI for the creation.
Adding Images to Text Cards
You can also create a card that combines both an image and text.
Images on both image cards and text cards automatically adjust their size to remain within the boundaries of the card, rather than filling the entire card.
To create a text card with an image, select the Text option.
While the card is selected, choose Add image in the tool bar that appears.
Then selected the desired file, crop as needed, and and save.
Then upload the image.
Image Upload Requirements
Uploaded images must meet the following specifications:
Minimum dimensions: 175 × 175 pixels
Maximum dimensions: 2560 × 2560 pixels
Maximum file size: 50 MB
The image alignment on the card follows the selected text alignment.
By default, the image is positioned above the text. To place it below the text, select the Change image alignment option.
If the text exceeds the available space, a scroll bar appears. Learners can also view an enlarged version of the image by selecting the full-screen option.
Creating Video Cards
To add a video card to a micro-course, select the Video option when adding a new card.
After uploading the video, drag the start and end handles on the timeline so that the entire length of the video is no less than two seconds and no more than sixty. Then select Trim.
During playback, learners can view the video in full-screen mode by selecting the full-screen icon.
Video Upload Requirements
Videos must not exceed 500 MB in file size.
Videos must be between 2 and 60 seconds in length. If they fall outside this range, they must be trimmed after upload.
Videos retain their original aspect ratio, which may result in borders appearing around the video.
Editing Cards
Selecting a section of text allows for the editing of that text. Save the edits by simply selecting anywhere else.
While editing text, select the AI icon, where available, to get some help from AI.
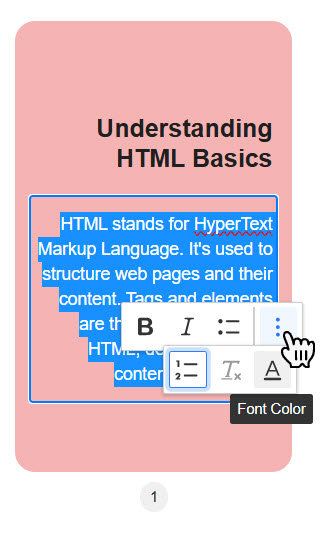
Selecting the card's pencil icon reveals a menu for further actions.
-
Change the color of the card
-
Align text
-
Add an image to a text card
-
Move the card's image above or below the text
-
Duplicate the card
-
Move card to the right
-
Hide the card. If hidden
, the card won't show up when the course goes live
-
Delete card
Change the color of the card: When editing an individual card, you can customize its appearance by selecting the Change color option. This opens a color picker, allowing you to choose from a set of predefined colors or enter a custom hex code to apply a specific background color to the card.
You can also modify the background color of highlighted text using the full color picker. Choose from the available color options or enter a specific hex code in the appropriate field.
Additional text formatting options include Bold, Italic, bulleted lists, numbered lists, and Remove Format.
Branding
While editing a micro-course, the Branding option is available at the bottom of the page, allowing you to customize the course’s visual identity.
You can configure the default background and font colors for cards using this option. Select from a range of predefined colors or enter a specific hex code in the corresponding field. If cards have already been created, you can apply these settings to them by selecting the “Apply to all existing cards” checkbox.
Scheduling and Publishing Microlearning
The following steps are the same both for AI and from Scratch.
You are able to schedule the micro-course, so that the cards and stacks appear in a predetermined sequence over a period of time. To do so, select Custom Schedule.
Select the days of the week you'd like the cards and stacks to be distributed. Then determine when the first and last card should be presented on each of those days.
In the drop-down menu that appears, select how often the cards and stacks should appear within that timeline.
Stacks can be thought of as a card with two sides. The content is on the front, and on the back a question regarding the content. You can determine how far apart these two sides are revealed to the learner. The stack interval takes precedence over the card schedule. Meaning, whatever interval you select here will add to the time between cards, as well.
| Example of scheduling |
|
Let's say you have twelve cards and make them available on Mondays and Wednesdays, between 1:00pm and 3:00pm, at an interval of once an hour. This means three cards are released each Monday and each Wednesday (at 1:00, 2:00, and 3:00) — six per week. The micro-course would take two weeks to finish. If you set them up in an interval of once every half an hour, using the same timeline, the course would only need one week. If one stack with an interval of ten minutes was introduced into the schedule, it would add that ten minute delay to the schedule. At some point that ten minutes would delay the last card of the day back by ten minutes, pushing that card to the next day; the last card's release time would come at 3:10, ten minutes after the last card can be released on that day. |
Please Note: The learner must currently be logged into their academy in order to view revealed cards immediately when scheduled. If a schedule spans three days, but a learner doesn't log in for a week after they've been assigned the micro-course, they would receive all the cards and stacks at one time.
The last step is to set the visibility. Choose your preference and click Publish to publish your micro-course.
Related Articles
Creating Micro-courses Using AI
Taking a Microlearning Micro-Course: For learners who want to take a micro-course.
Assigning, Unassigning, and Reassigning Microlearning: For managers who need to assign, unassign, or reassign Microlearning